Table of Contents
- Introduction to MySQL Databases in cPanel
- Why MySQL Databases Are Important
- How to Access cPanel
- What Is MySQL Database Wizard?
- Step 1: Create a New Database
- Step 2: Create a Database User
- Step 3: Assign User Privileges
- Step 4: Database Creation Completed
- Database Security Best Practices
- Common MySQL Database Errors
- Frequently Asked Questions
Creating a MySQL database is one of the most essential tasks when setting up a website or web application on a hosting server.
Most modern PHP applications and frameworks such as WordPress, Laravel, Symfony, and Zend Framework require a MySQL database to store and manage data.
Fortunately, cPanel provides an easy-to-use tool called MySQL Database Wizard, allowing users to create databases, database users, and permissions in just a few simple steps.
In this complete guide, you will learn how to create a MySQL database using cPanel, configure database users, assign permissions, and secure your database properly.
Introduction to MySQL Databases in cPanel
MySQL is one of the most widely used relational database management systems in the world.
It allows websites and applications to:
- Store user information
- Manage website content
- Save application settings
- Process dynamic data
- Handle eCommerce transactions
- Manage membership systems
Most shared hosting providers include cPanel, which simplifies database management through graphical tools instead of complex command-line operations.
Why MySQL Databases Are Important
Modern websites rely heavily on databases to function properly.
Applications That Require MySQL Databases
- WordPress websites
- WooCommerce stores
- Laravel applications
- Forum software
- Membership systems
- Custom PHP applications
Without a properly configured database, dynamic websites cannot store or retrieve information efficiently.
How to Access cPanel
Before creating a database, you must first log in to your cPanel hosting account.
Typical cPanel Login URL
https://yourdomain.com:2083
Or:
https://yourdomain.com/cpanel
Enter your hosting username and password provided by your hosting company.
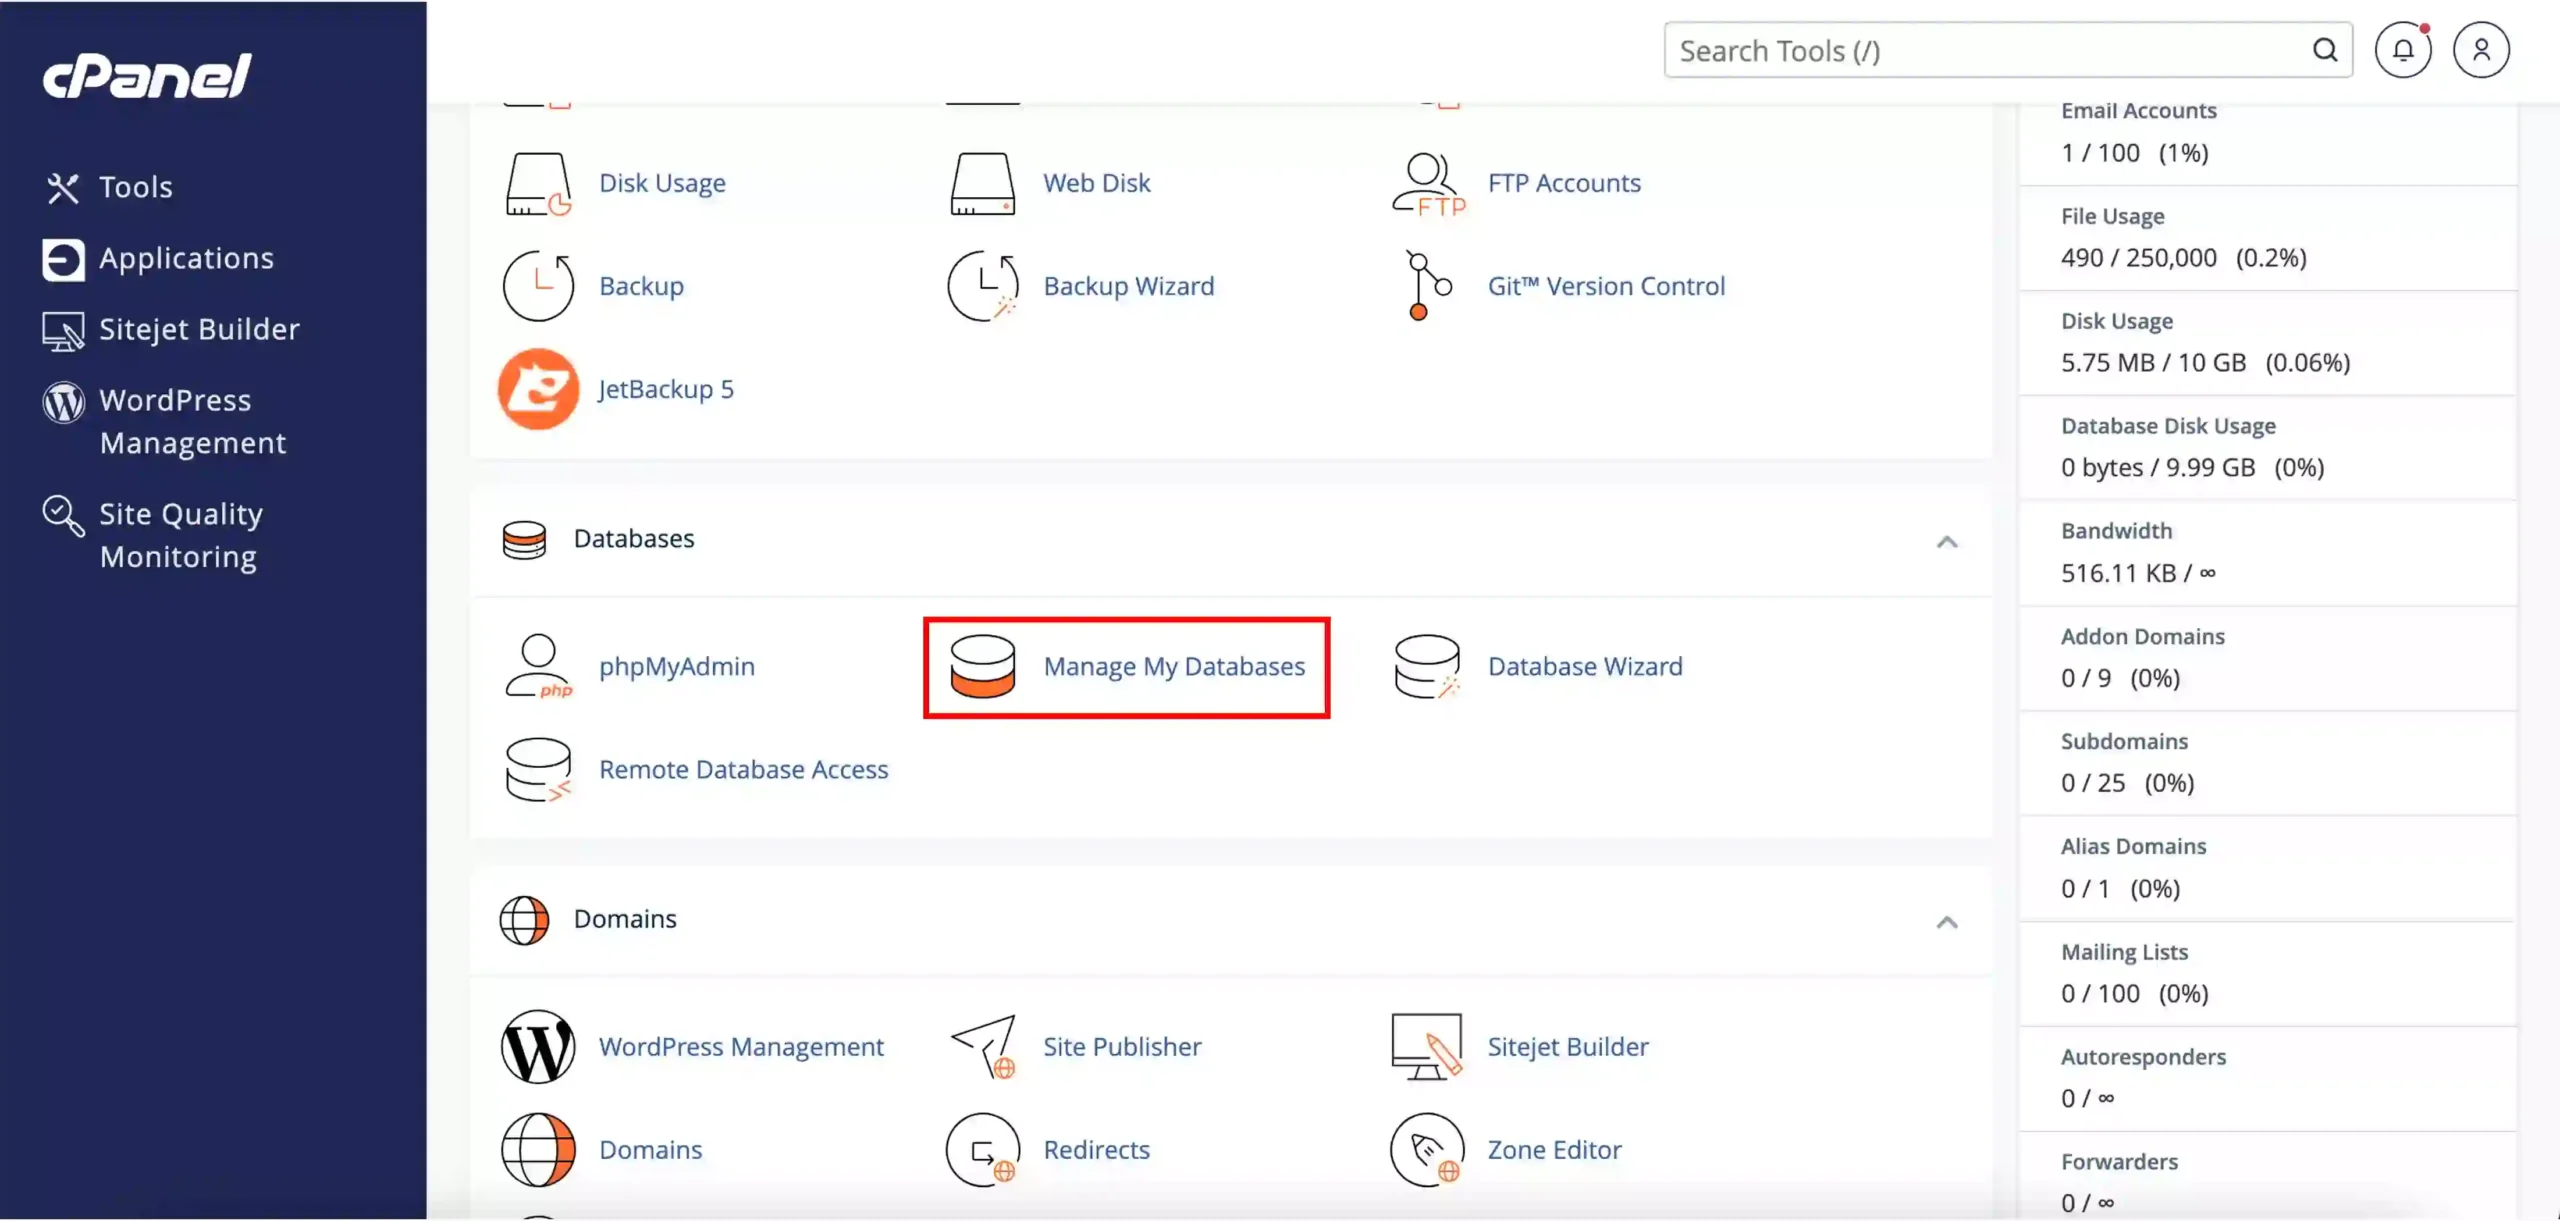
After logging in successfully, locate the Databases section inside the cPanel dashboard.

What Is MySQL Database Wizard?
The MySQL Database Wizard is a beginner-friendly cPanel tool designed to simplify the database creation process.
Instead of manually configuring databases and users separately, the wizard guides you through the process step by step.
Main Features of MySQL Database Wizard
- Create new MySQL databases
- Create database users
- Assign user permissions
- Configure database access
- Simplify database setup
This tool is especially useful for beginners with limited server management experience.
Step 1: Create a New Database
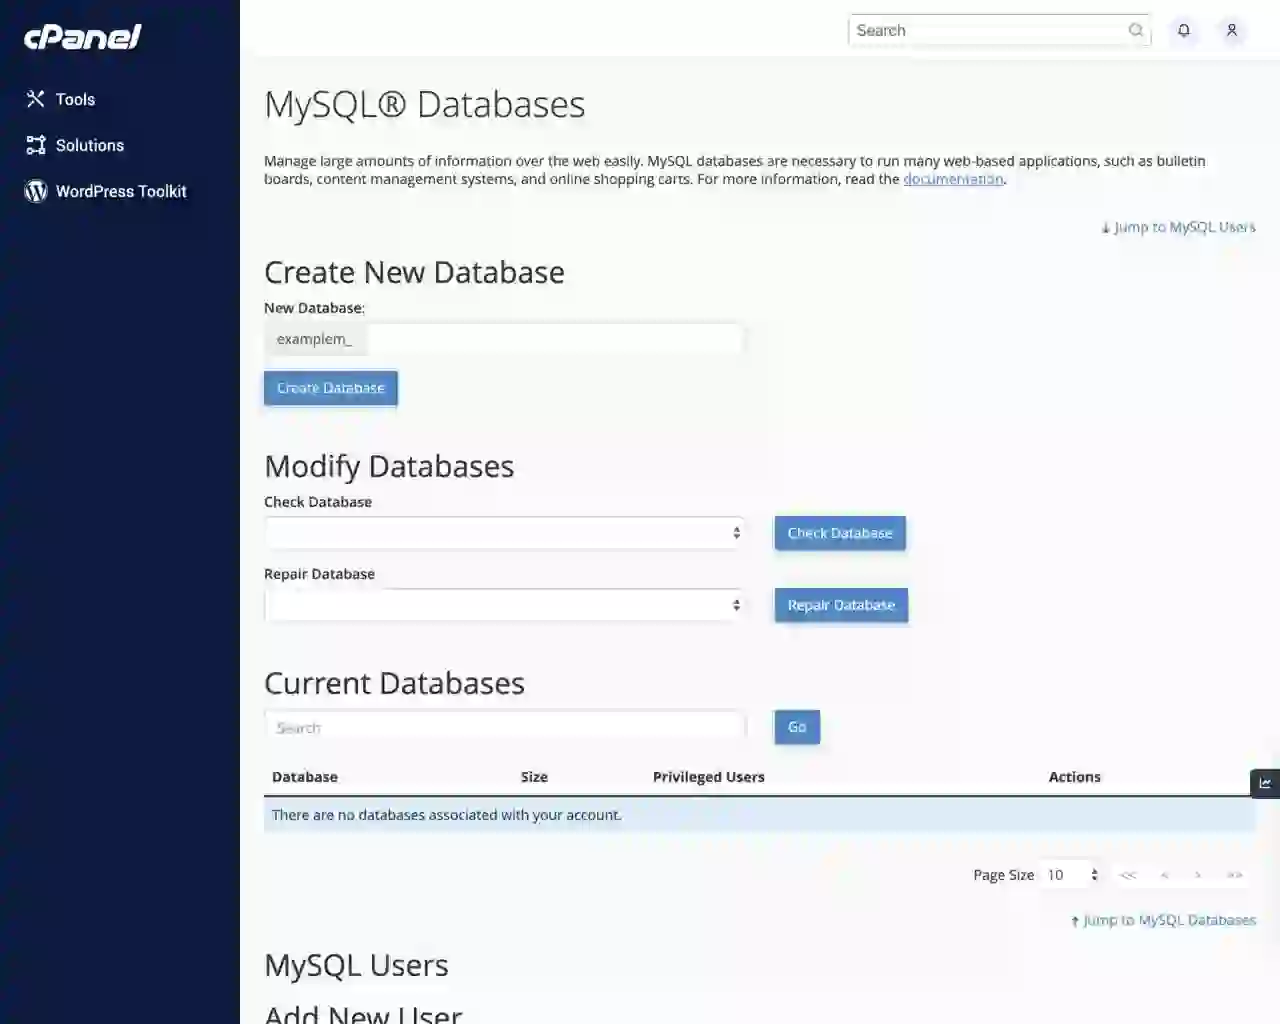
After opening the MySQL Database Wizard, the first step is creating your database.
How to Create the Database
- Navigate to the “Databases” section in cPanel
- Click “MySQL Database Wizard”
- Enter your desired database name
- Click “Next Step”
Understanding Database Prefixes
cPanel automatically adds a prefix based on your hosting username.
For example:
username_databasename
This system prevents naming conflicts between hosting accounts on the same server.
Example Database Name
myhosting_newdb
Choosing descriptive database names helps organize multiple websites and applications more effectively.
Step 2: Create a Database User
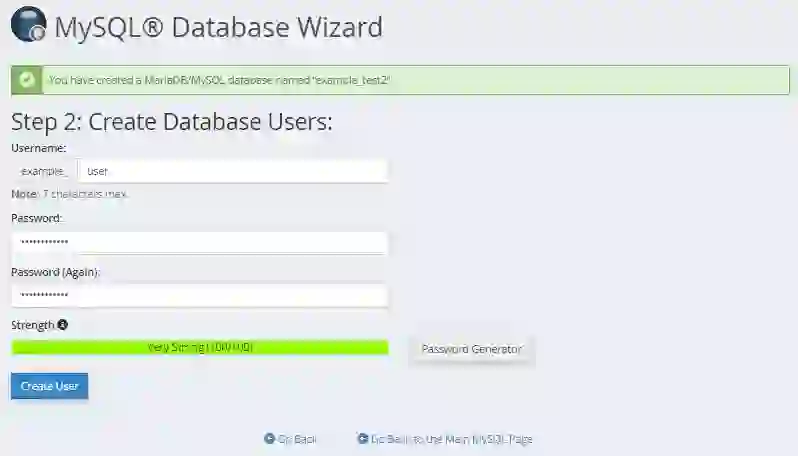
After creating the database, the next step is creating a MySQL user account.
This user will be responsible for accessing and managing the database.
How to Create the User
- Enter a database username
- Create a strong password
- Confirm the password
- Click “Create User”
Use Strong Passwords
cPanel includes a built-in Password Generator that creates secure passwords automatically.
Strong passwords are essential for protecting your website from database attacks and unauthorized access.
Important Security Note
cPanel usually does not display your database password again after creation.
Make sure to save your database credentials securely.
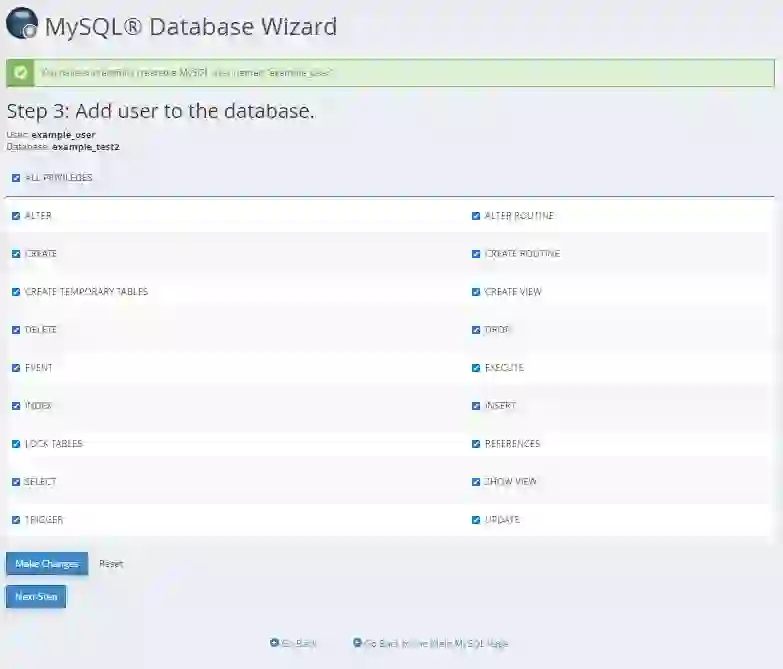
Step 3: Assign User Privileges
Once the database user is created, you must assign permissions that determine what actions the user can perform.
Common Database Privileges
- SELECT
- INSERT
- UPDATE
- DELETE
- CREATE
- DROP
- ALTER
For most website applications, it is recommended to grant ALL PRIVILEGES.
How to Assign Privileges
- Select the desired privileges
- Or choose “ALL PRIVILEGES”
- Click “Make Changes”
This allows the application to communicate fully with the database.
Step 4: Database Creation Completed
After completing the previous steps, cPanel will display a confirmation message indicating that:
- The database has been created
- The user was successfully assigned
- Privileges were applied correctly
Additional Useful Options
cPanel also provides quick-access links for:
- Adding another database
- Adding another user
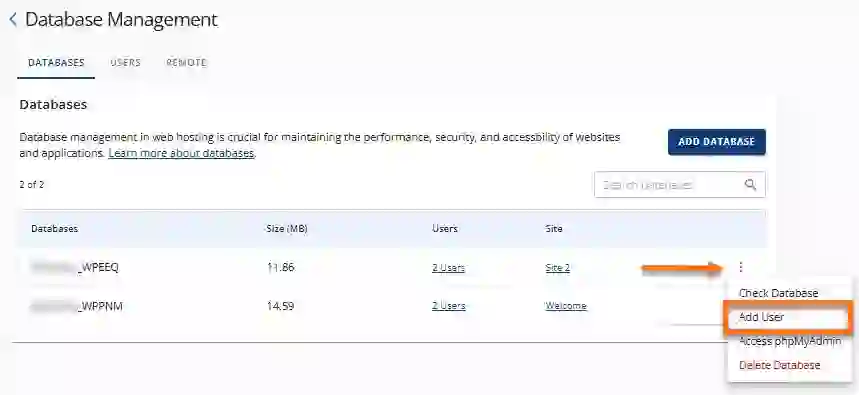
- Returning to MySQL Databases
- Returning to the cPanel homepage
Your new MySQL database is now ready for use.
Database Security Best Practices
Proper database security is essential for protecting your website and sensitive information.
Recommended Security Practices
- Use strong passwords
- Limit database privileges when possible
- Regularly update applications
- Create database backups frequently
- Use secure hosting environments
- Remove unused databases and users
Following these practices reduces the risk of hacking attempts and database breaches.
Common MySQL Database Errors
Beginners sometimes encounter database connection issues during website installation.
Common Problems Include
- Incorrect database name
- Wrong database username
- Invalid password
- Missing user privileges
- Incorrect database host
Double-check all database credentials carefully during website setup.
Final Thoughts
The MySQL Database Wizard in cPanel makes database creation simple and beginner-friendly.
By following the correct steps, users can quickly create databases, assign users, configure permissions, and prepare hosting environments for websites and web applications.
Whether you are installing WordPress, developing a Laravel project, or launching a custom PHP application, understanding database creation is an essential hosting skill.
With proper database management and security practices, your website will operate more efficiently and securely.
Frequently Asked Questions
What is MySQL Database Wizard in cPanel?
It is a cPanel tool that simplifies the process of creating databases, users, and permissions.
Do I need a MySQL database for WordPress?
Yes, WordPress requires a MySQL database to store content, settings, and user information.
Should I grant all privileges to my database user?
For most website applications, granting all privileges is recommended for proper functionality.
Can I create multiple databases in cPanel?
Yes, most hosting plans allow users to create multiple MySQL databases.
What happens if I forget my database password?
You can reset the database user password directly from cPanel.Introduction: About creating MySQL databases utilizing cPanel
Any generally used PHP framework, corresponding to Laravel, Symphony, and Zend, will work. On this tutorial, we’ll information you thru creating a brand new MySQL database utilizing the MySQL Database Wizard device obtainable in your cPanel internet hosting account. By following just a few easy steps, you’ll create the brand new database, assign a consumer to it, and outline the permissions you wish to grant so your utility can talk with it appropriately.
Begin :
Step one is to log in to your cPanel account. You are able to do this by following our tutorial on find out how to entry the cPanel service.
After logging into your cPanel account, please choose the “ Database ” part and click on on the “ MySQL Database Wizard ” icon.
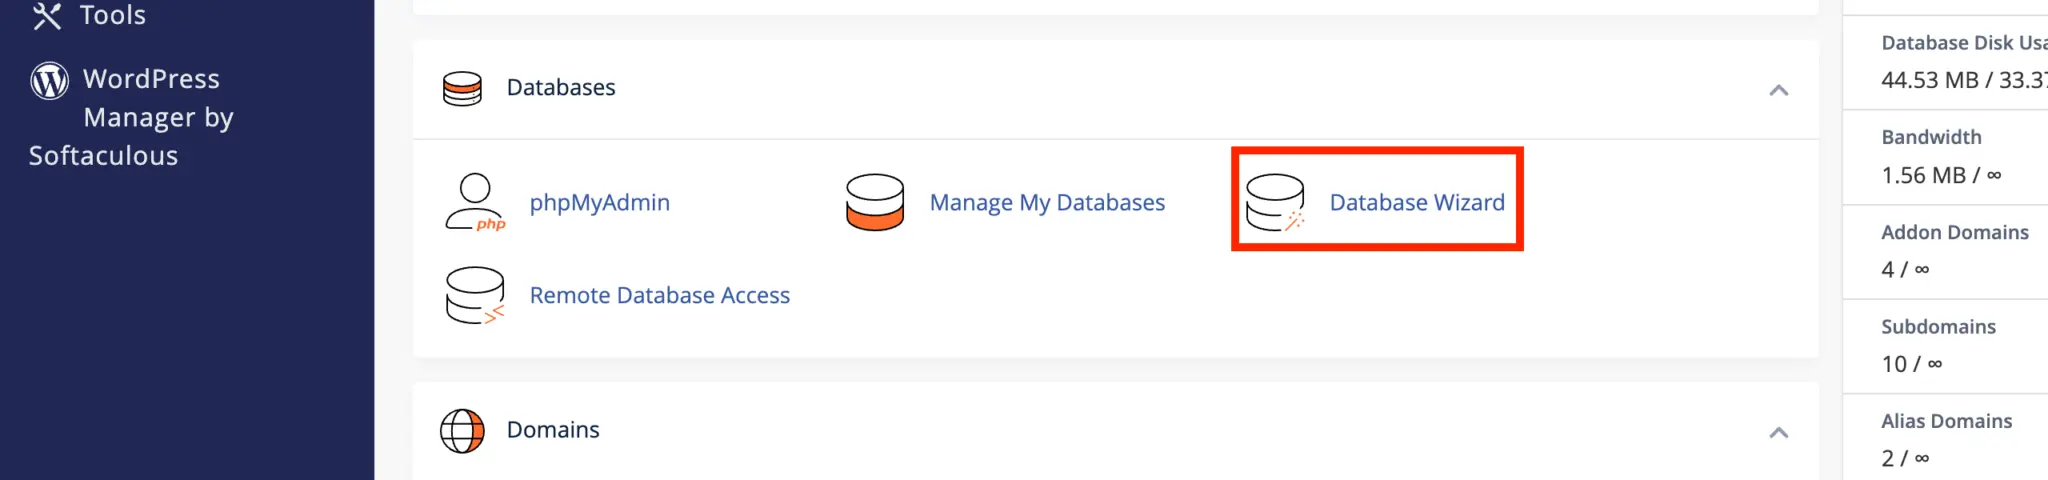
Subsequent, you’ll be redirected to the wizard’s dashboard the place you’ll have to full 4 easy steps to create your new MySQL database.
The best way to create a MySQL database from cPanel
Create a brand new database
Within the following paragraphs, we are going to evaluation every step of the database creation course of individually to keep away from confusion and clarify the whole lot in as a lot element as doable.
Step 1: Determine the database title
In step one, you will have to specify the title of your database by typing the database suffix within the empty discipline.
Observe: cPanel provides a prefix to every database consisting of the primary eight characters of the username to personalize the databases and stop conflicts between customers. This ensures a novel title for every database on the server. The database title will probably be generated within the following format: “ prefix_suffix ”, for instance, “ hatutorials_newdb ”.
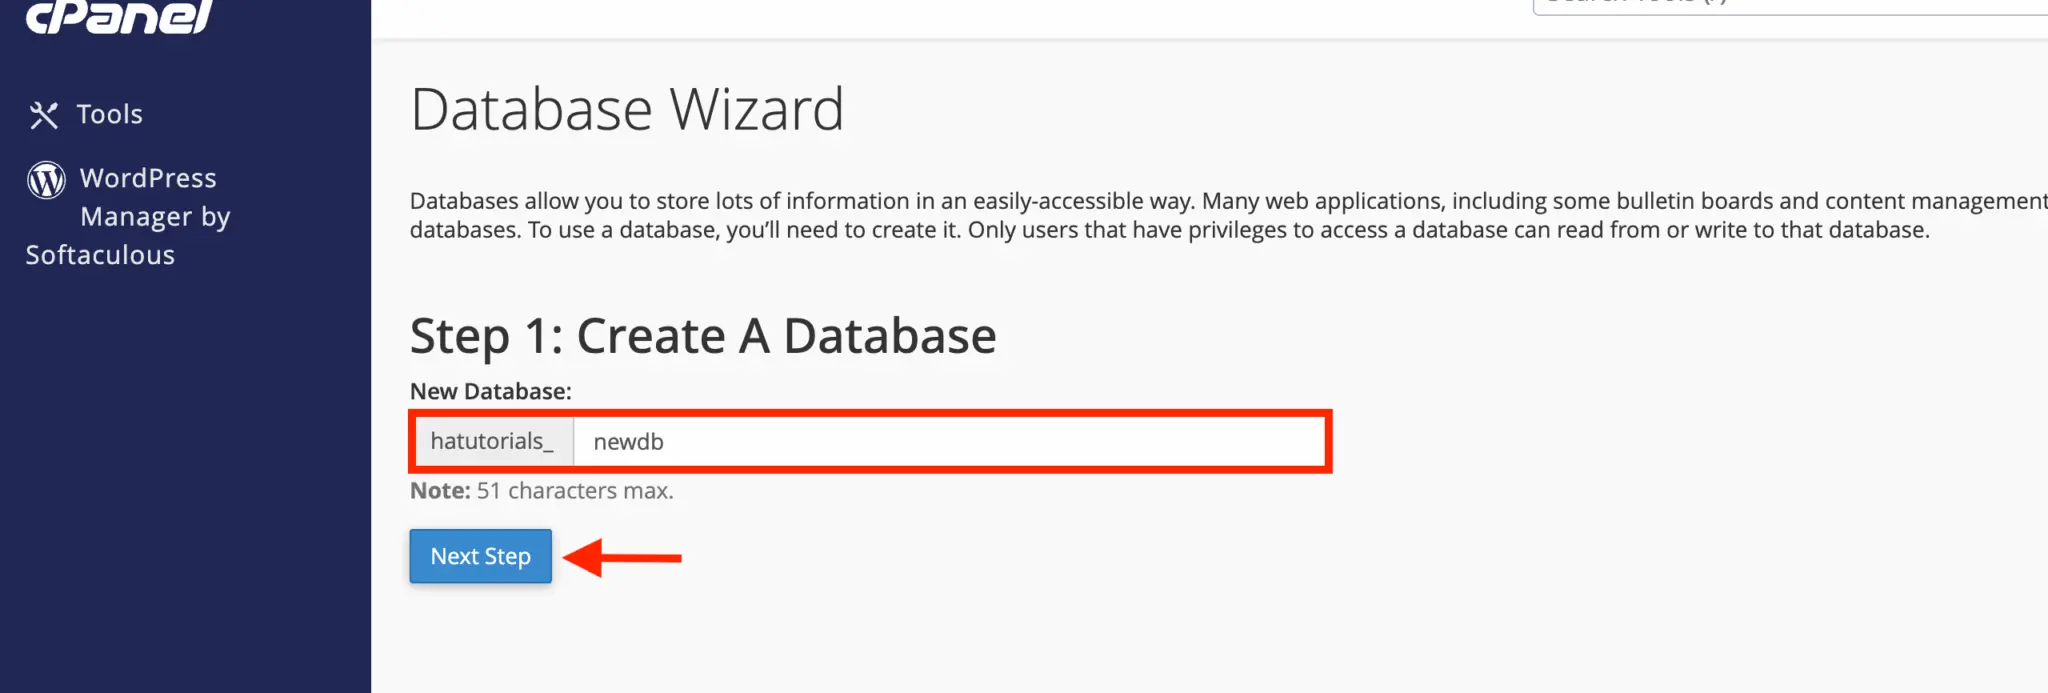
Upon getting completed typing your database title, please click on the “ Subsequent Step ” button.
Step 2: Create a database consumer
Within the second step, you will have to create a database consumer account that will probably be assigned to and used for future administration. Enter the database username and password within the designated fields. We advocate utilizing a ” Password Generator ” device, which can give you a safe password to your database.
Normal notice: cPanel will not assist you to evaluation your database password sooner or later. You possibly can solely change it. Save your information in a file so you may check with it when wanted.
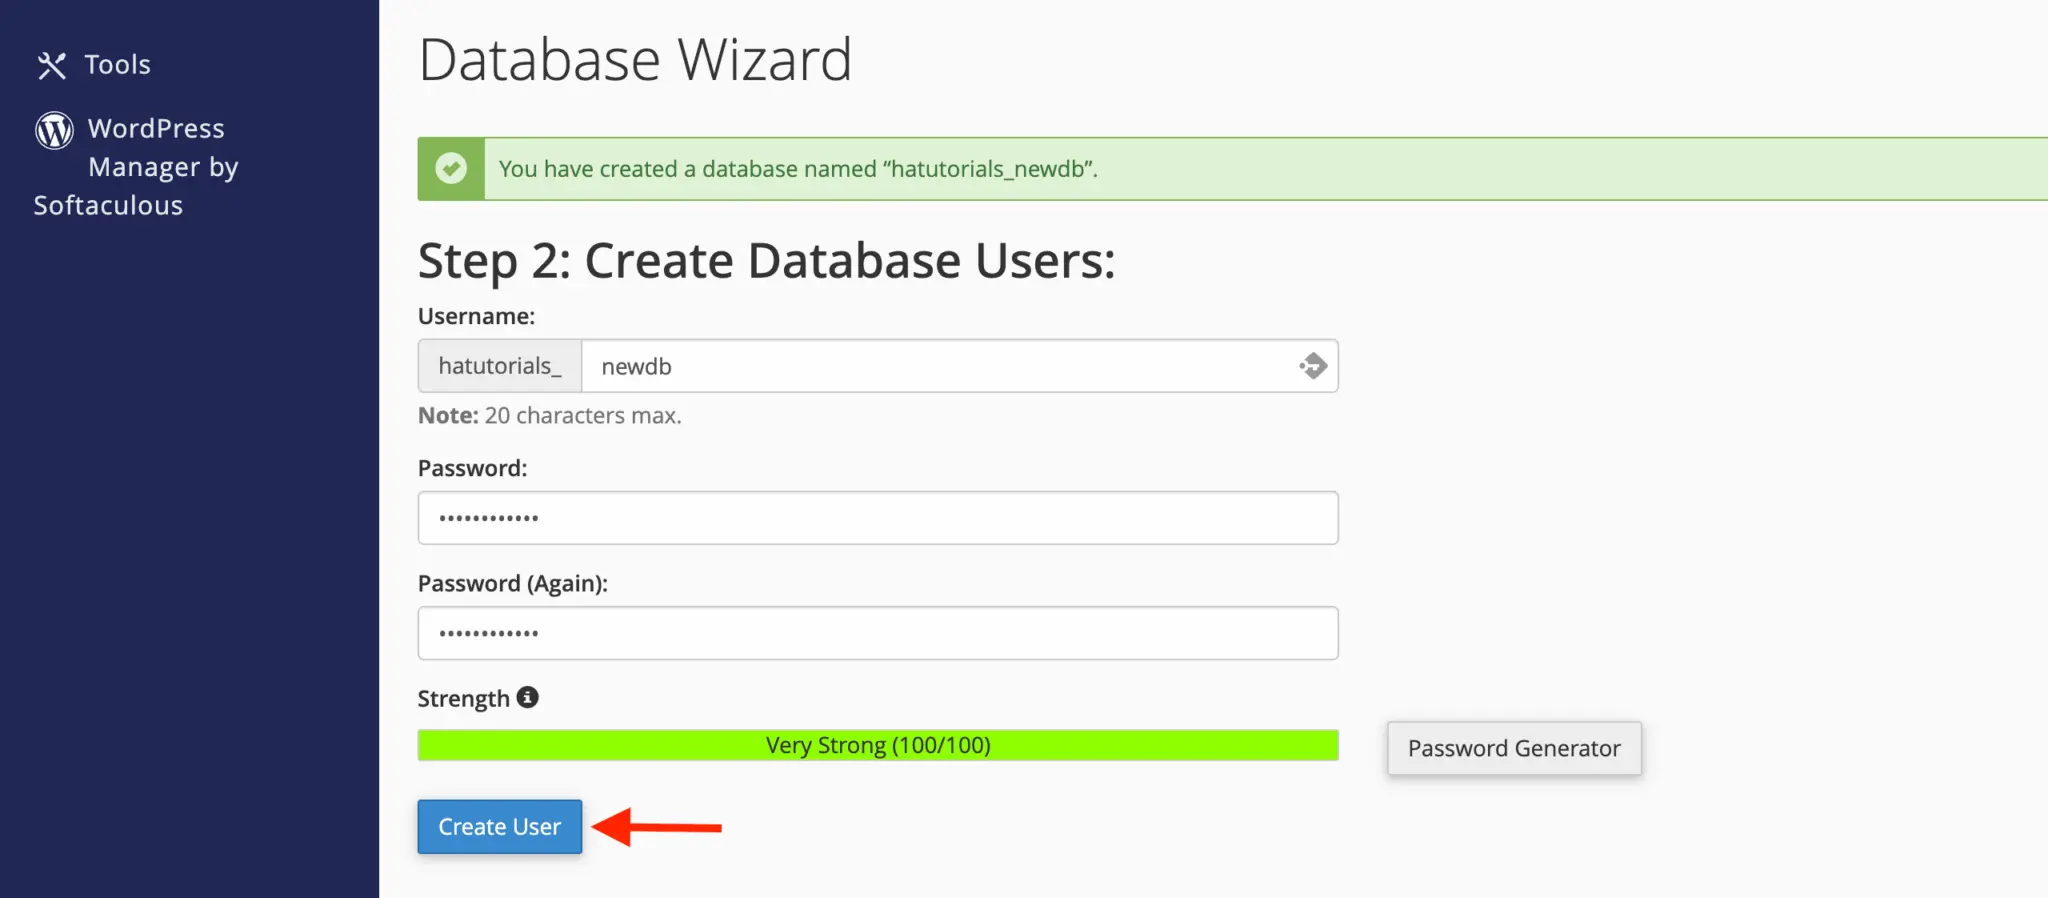
If you find yourself prepared, please click on the “ Create Consumer ” button.
Step three: Defining database privileges
Within the third step, assign consumer privileges to allow them to execute SQL queries and absolutely work together with the database. To activate a particular privilege, test the corresponding field. If you wish to grant the consumer all privileges directly , click on the “ALL PRIVILEGES” choice .
In case you are organising this rule to be used on a web site, it’s usually finest to grant the consumer full permissions to make sure the location works with out issues connecting to the database or executing instructions.
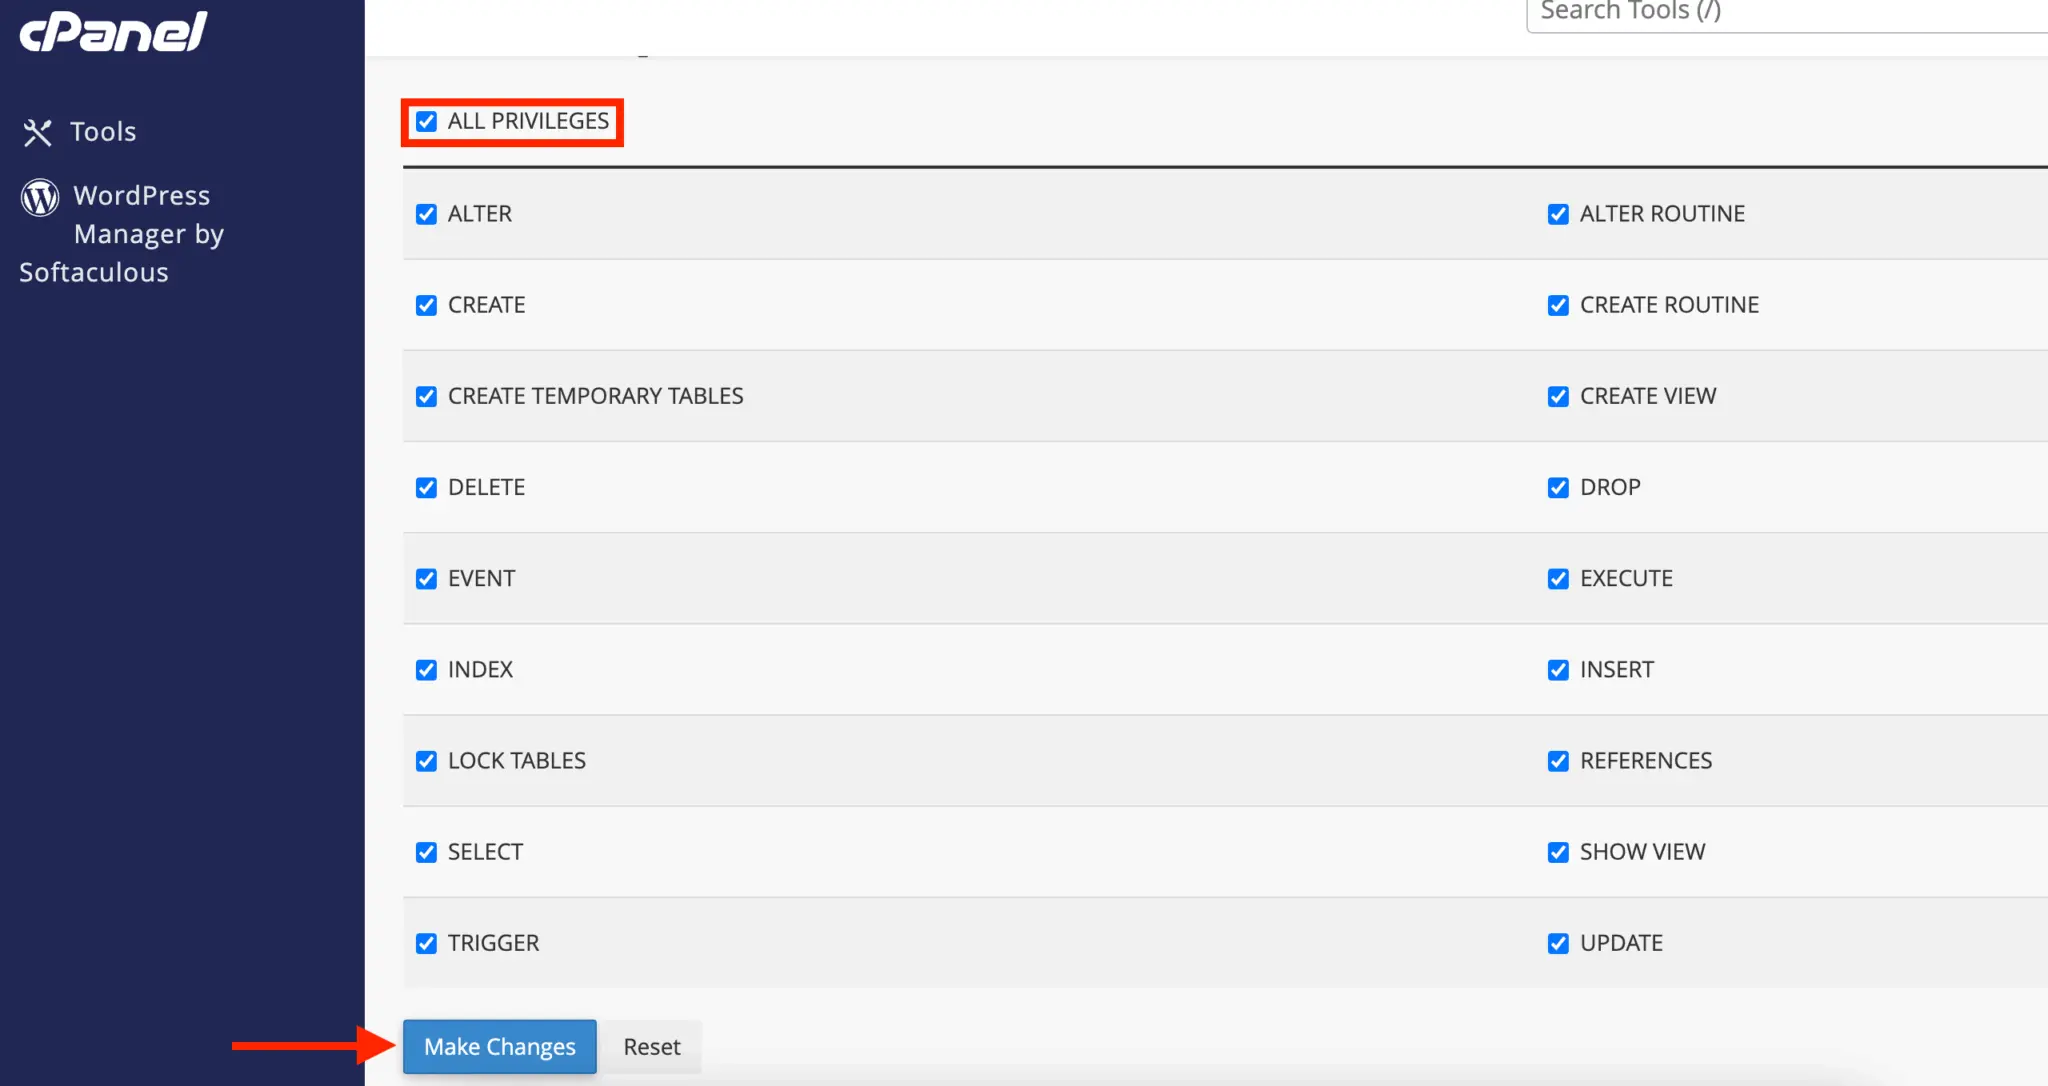
If you find yourself prepared, please click on the “ Make Modifications ” button to finish the database creation.
Step 4: The duty has been accomplished
Within the fourth and remaining step, you will note a message stating that your database has been created and the consumer has been efficiently assigned to it.
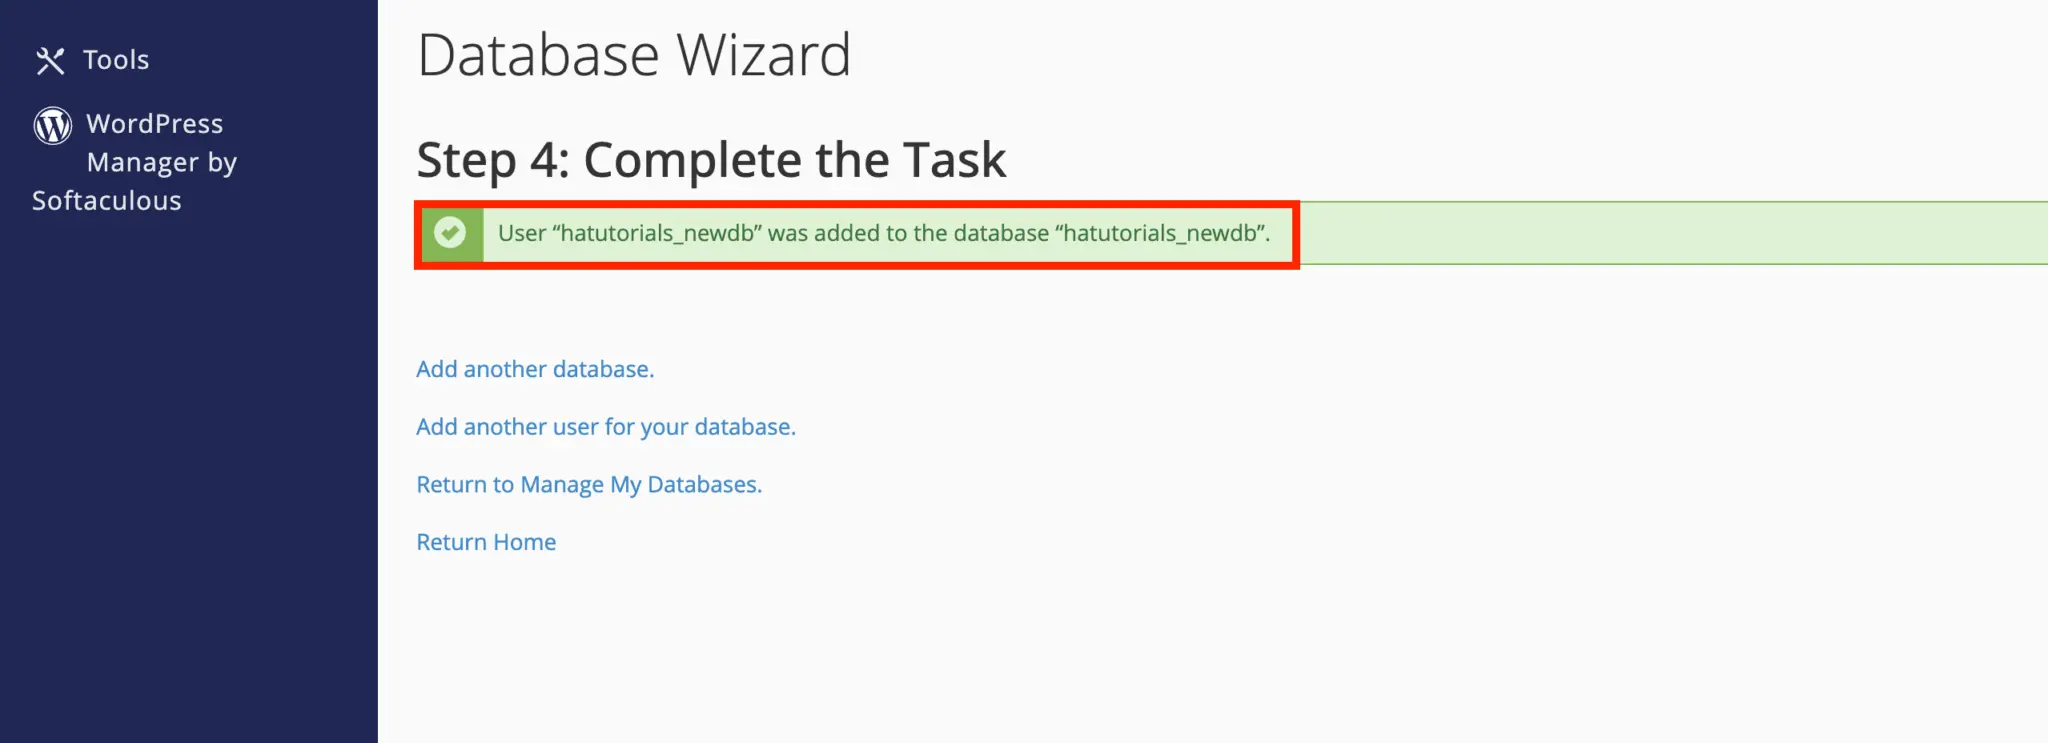
Beneath the immediate, you can see some helpful hyperlinks that you should use to proceed your work:
-
- Add One other database : Please click on on this hyperlink when you want to add one other database and undergo the identical course of described above.
- Add one other consumer to your MySQL database : Please click on on this hyperlink when you want to add one other consumer to the identical MySQL database.
- Return Residence : Please click on on this hyperlink when you want to return to the cPanel dwelling web page.
Congratulations! You’ve gotten efficiently created your new MySQL database. Now you can customise it to your undertaking and start improvement. We hope this information was useful and our directions had been simple to comply with. For any additional questions, please depart a remark.