Table of Contents
- Introduction to Windows 11
- How to Take Screenshots on Windows 11
- How to Split Screen on Windows 11
- How to Defrag Windows 11
- Using Microsoft Teams on Windows 11
- How to Use the Windows 11 Media Creation Tool
- How to Create a Windows 11 Disc Image
- Best Productivity Features in Windows 11
- Windows 11 Optimization Tips
- Frequently Asked Questions
Best Windows 11 Tips and Tricks Every User Should Know
Windows 11 introduced a modern redesign, enhanced productivity tools, improved gaming support, and deeper integration with Microsoft services.
For many Windows 10 users, the upgrade to Windows 11 became available as a free update, although some systems required BIOS updates and TPM activation before installation.
The new operating system also brought several exciting features, including Android app compatibility, Snap Layout multitasking, enhanced security, and improved user interface customization.
Whether you are a beginner or an experienced PC user, understanding the best Windows 11 tips and tricks can significantly improve your productivity and overall experience.
In this guide, we explore some of the most useful Windows 11 features and explain how to use them effectively.
Introduction to Windows 11
Windows 11 represents one of Microsoft’s largest operating system redesigns in years.
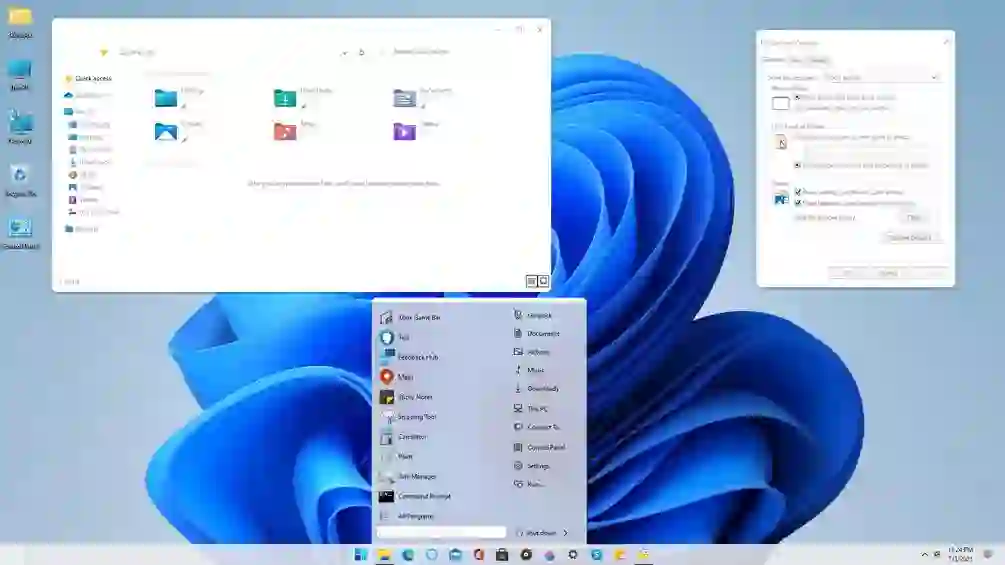
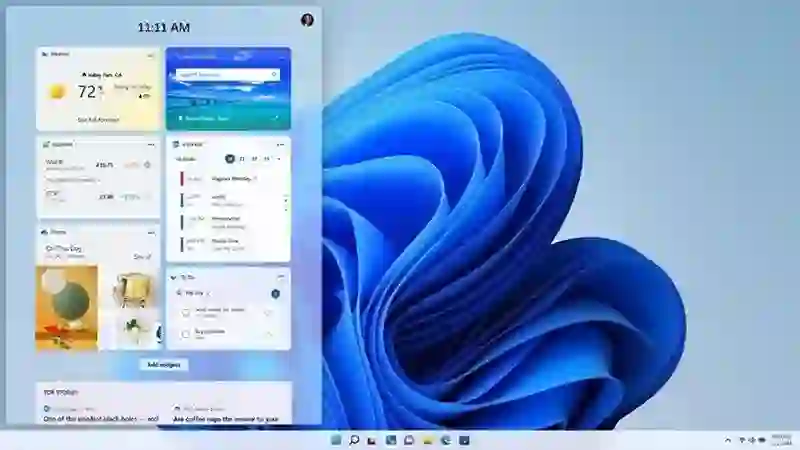
The system introduces a cleaner interface, centered taskbar, rounded window designs, improved virtual desktops, and stronger multitasking features.
Main Improvements in Windows 11
- Modern visual interface
- Enhanced Snap Layouts
- Android app support
- Improved gaming performance
- Better security integration
- Microsoft Teams integration
- Advanced storage optimization
To learn more, check our guide on Windows 10 Support Ends in 2025.
These changes aim to create a faster, more productive, and more user-friendly computing environment.
How to Take Screenshots on Windows 11
Windows 11 includes several methods for capturing screenshots depending on your needs.
1. PrtSc Key
Pressing the Print Screen (PrtSc) key captures the entire screen and copies it to the clipboard.
2. Windows Key + PrtSc
This shortcut automatically saves a screenshot as a file inside the Screenshots folder.
3. ALT + PrtSc
This method captures only the currently active window.
4. Windows Key + Shift + S
This shortcut opens the Snipping Tool interface, allowing users to capture selected areas of the screen.
5. Snip & Sketch Delay
The Snip & Sketch utility supports delayed screenshots for capturing menus or timed actions.
6. CTRL + ALT + PrtSc
With third-party tools such as PicPick, users can capture scrolling webpages and long documents.
These flexible screenshot tools make Windows 11 ideal for productivity, tutorials, presentations, and remote work.
How to Split Screen on Windows 11
Windows 11 introduces improved multitasking through enhanced split-screen functionality.
Using Snap Layouts
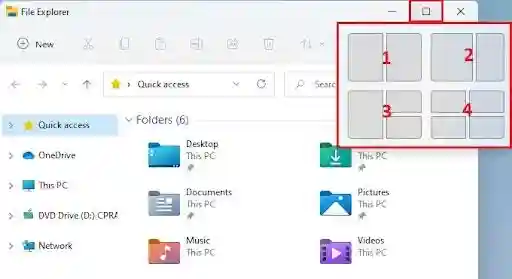
Hover your mouse over the maximize button on any window to access Snap Layouts.
You can quickly organize windows into:
- Two-screen layouts
- Three-window layouts
- Four-window grids
- Custom multitasking arrangements
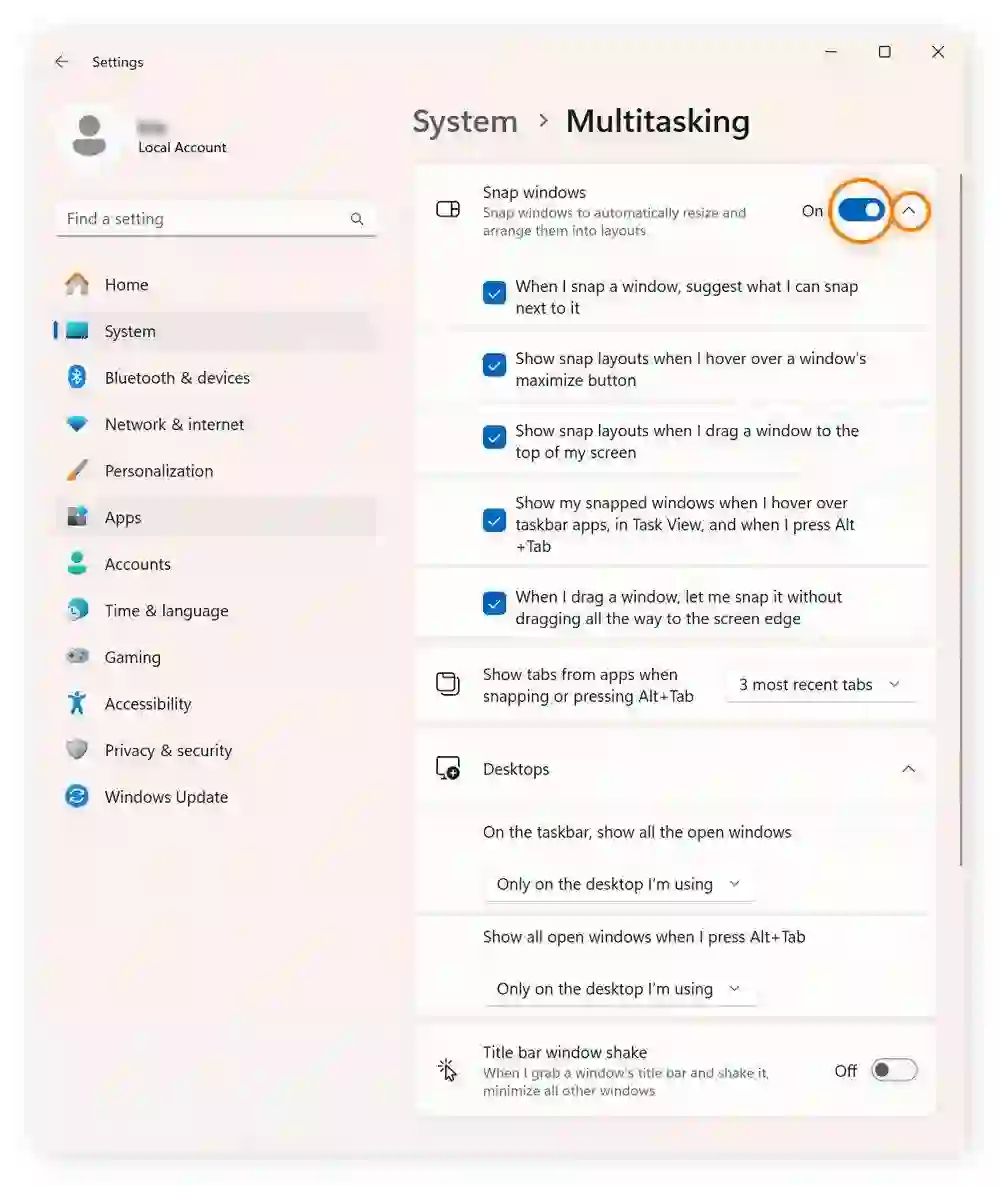
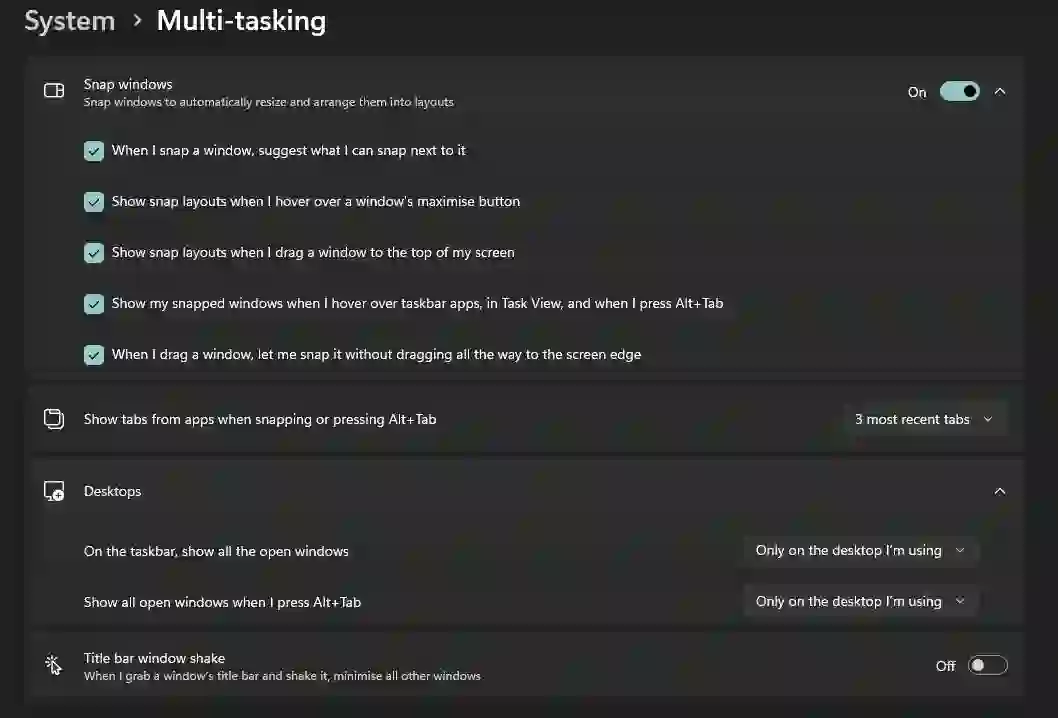
Using Multitasking Settings
To enable advanced multitasking features:
- Open Settings
- Go to System
- Select Multitasking
- Enable Snap Windows and related options
Snap Layouts significantly improve productivity when working with multiple applications simultaneously.
How to Defrag Windows 11
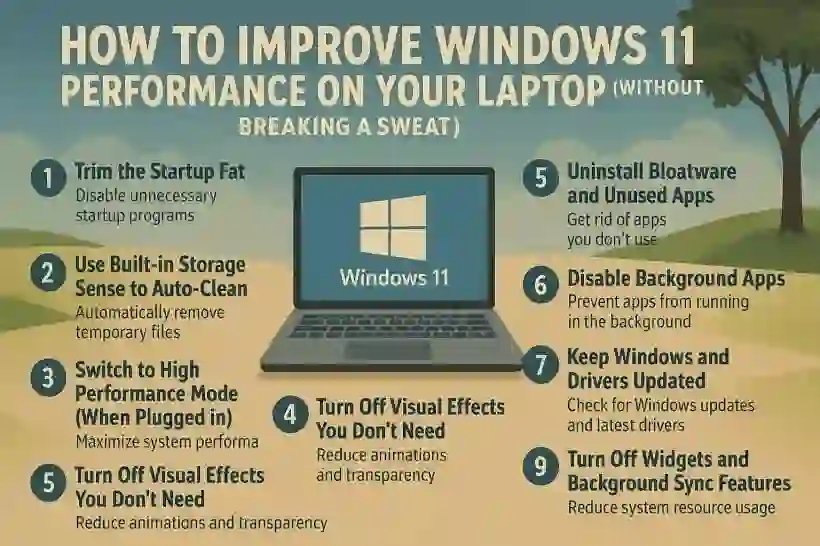
If your computer experiences slow performance, defragmenting storage drives may help improve efficiency.
Fragmentation occurs when data becomes scattered across different areas of a hard drive.
Benefits of Defragmentation
- Faster file access
- Improved application loading
- Better overall system performance
- Reduced storage delays
To learn more, check our guide on Qwen 3 AI Model Update.
Steps to Defrag Windows 11
- Open Settings
- Go to System
- Select Storage
- Open Advanced Storage Settings
- Choose Drive Optimization
- Analyze the drive
- Click Optimize
Note that SSD drives generally require optimization rather than traditional defragmentation.
Using Microsoft Teams on Windows 11
Microsoft Teams is deeply integrated into Windows 11 to support communication and remote collaboration.
How to Start Using Microsoft Teams
- Open Microsoft Teams
- Sign in with your Microsoft account
- Use the Chat icon from the taskbar
- Start conversations or meetings
Main Features
- Instant messaging
- Video calls
- Team collaboration
- File sharing
- Notifications and alerts
Teams integration makes Windows 11 especially useful for remote workers, students, and businesses.
How to Use the Windows 11 Media Creation Tool
The Media Creation Tool allows users to create installation media for Windows 11.
This tool is useful for:
- Fresh Windows installations
- System recovery
- Bootable USB creation
- Installing Windows on unsupported systems
To learn more, check our guide on OpenAI browser launch.
Steps to Create Installation Media
- Download the Media Creation Tool from Microsoft
- Launch the installer
- Select “Create Installation Media”
- Choose USB flash drive
- Select the target USB device
- Allow the tool to create the bootable image
After completion, users can use the USB drive to install or repair Windows 11 systems.
How to Create a Windows 11 Disc Image
Users who prefer DVDs instead of USB drives can also create a Windows 11 disc image.
How to Burn a Disc Image
- Open the Media Creation Tool
- Select ISO or DVD option
- Choose the DVD burner device
- Burn the image to disc
Disc images provide additional recovery and backup options for advanced users and IT professionals.
Best Productivity Features in Windows 11
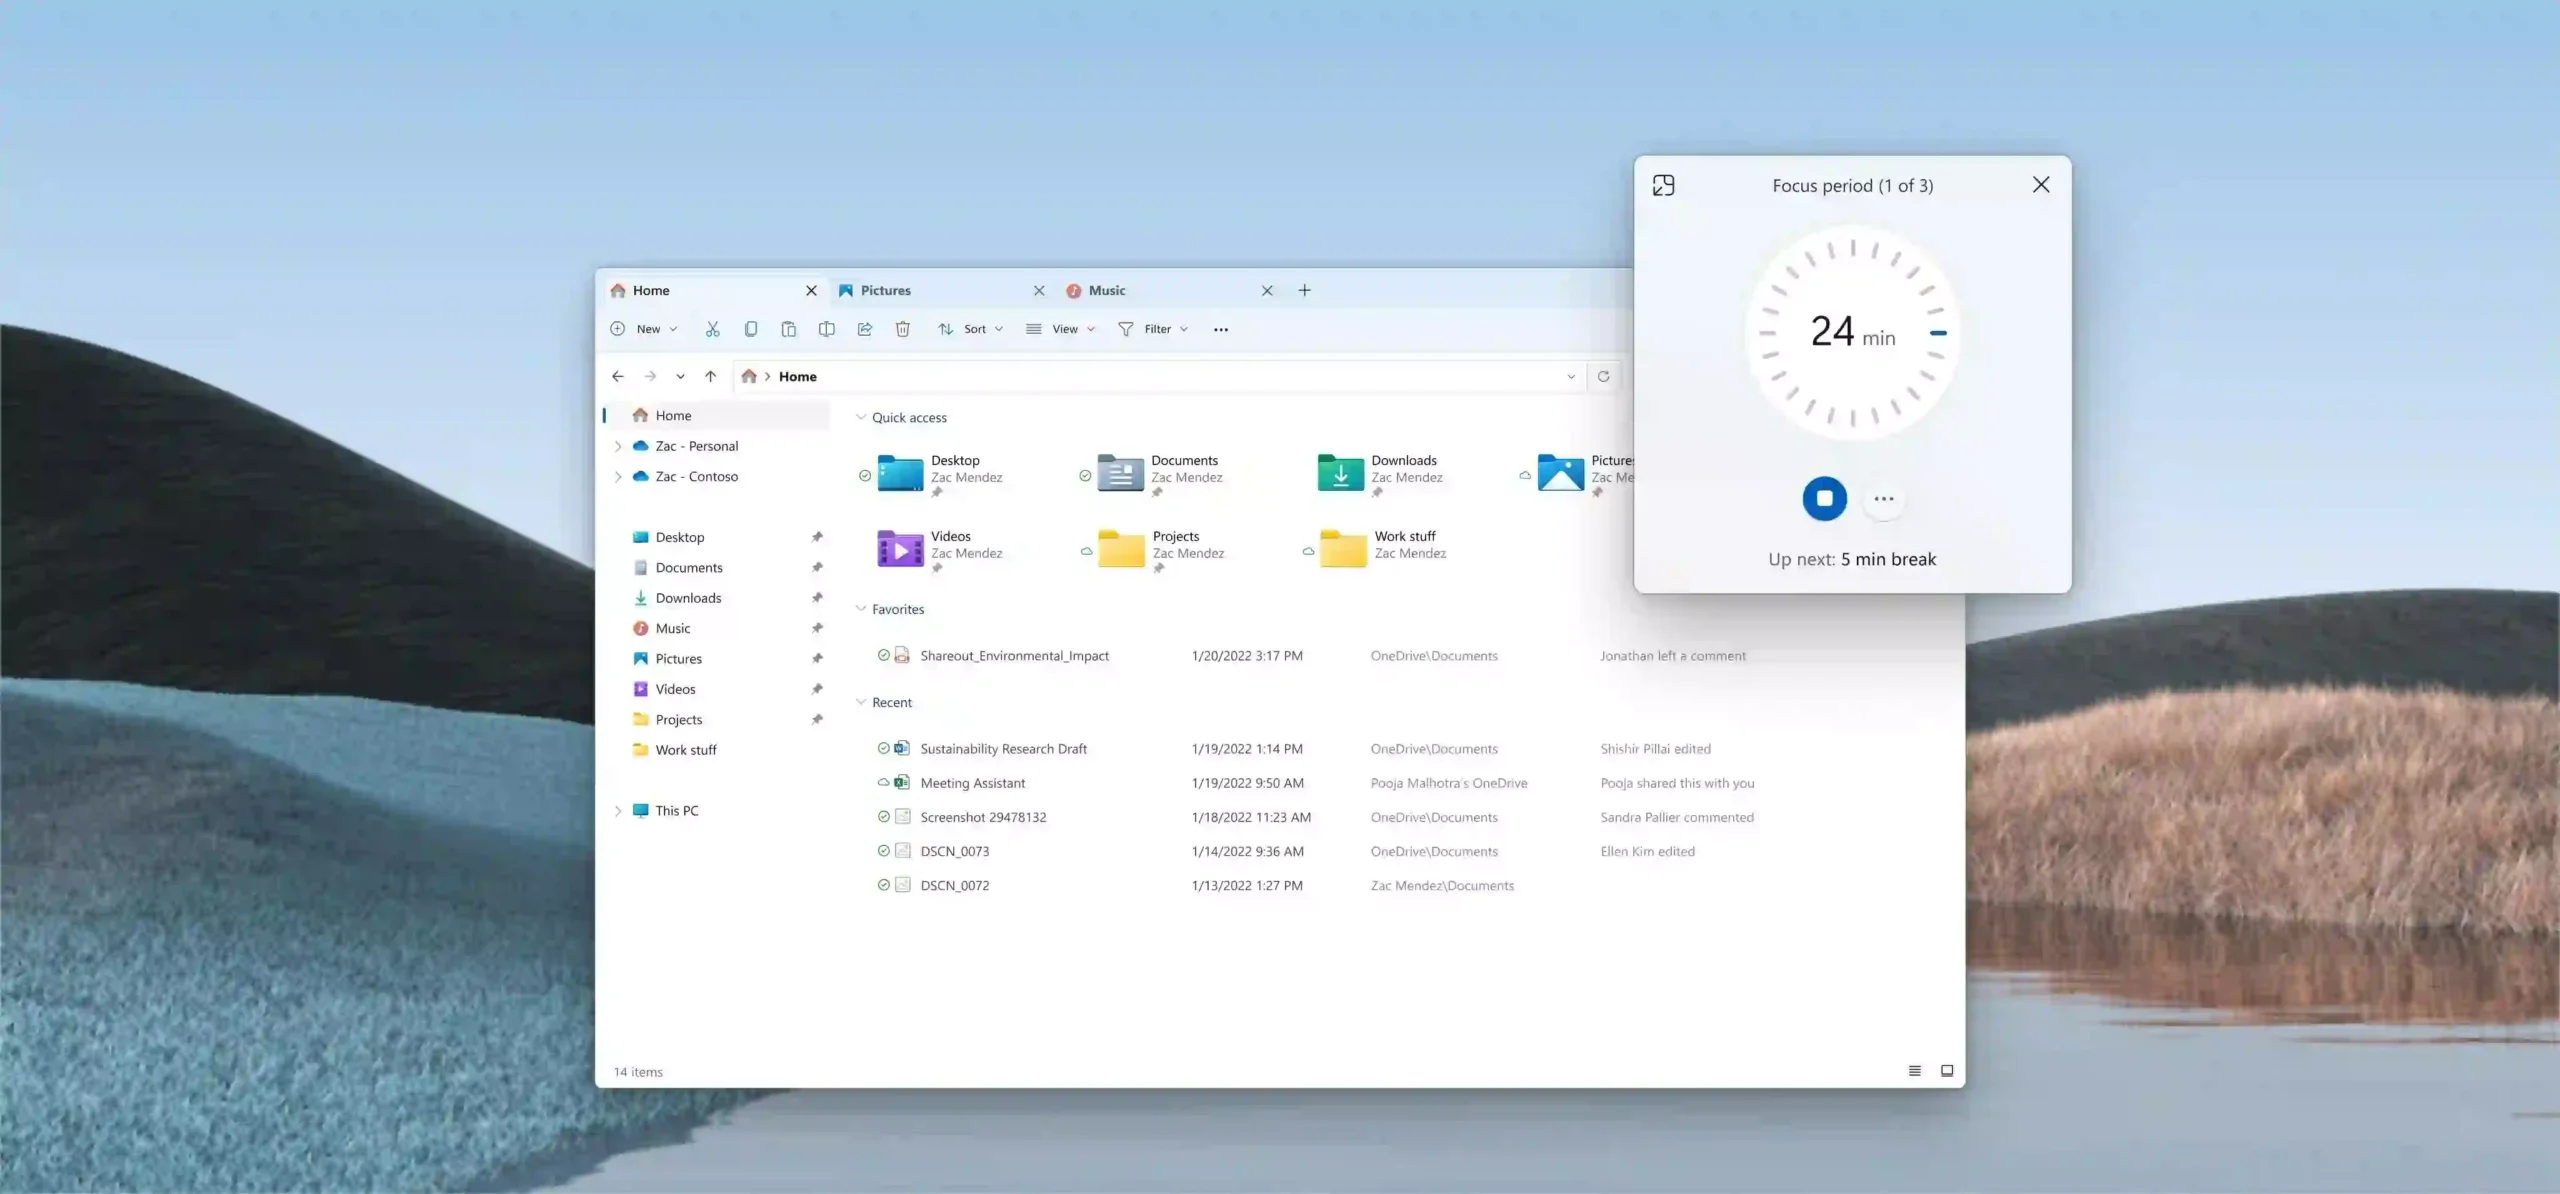
Windows 11 introduces several productivity-focused improvements.
Top Productivity Features
- Snap Layouts multitasking
- Virtual desktops
- Improved touch controls
- Integrated Microsoft Teams
- Enhanced search
- Android app support
- Better gaming optimization
These features help users organize workflows more efficiently and reduce distractions during work or study sessions.
To learn more, check our guide on MySQL database optimization.
Windows 11 Optimization Tips
Keeping Windows 11 optimized can improve performance and extend system stability.
Recommended Optimization Practices
- Keep Windows updated
- Remove unused applications
- Optimize storage drives
- Manage startup programs
- Enable security protections
- Use SSD storage when possible
- Clean temporary files regularly
Regular maintenance ensures smoother operation and better long-term performance.
Final Thoughts
Windows 11 introduces numerous improvements designed to modernize the Windows experience and improve productivity.
From screenshot shortcuts and Snap Layout multitasking to Microsoft Teams integration and Media Creation tools, the operating system provides both casual users and professionals with powerful new capabilities.
As Microsoft continues refining Windows 11 through future updates, additional features and enhancements are expected to expand its functionality even further.
Learning how to use these tools effectively can help users maximize productivity, improve performance, and enjoy a smoother computing experience.
Frequently Asked Questions
How do I take a screenshot on Windows 11?
You can use shortcuts such as PrtSc, Windows + PrtSc, or Windows + Shift + S to capture screenshots.
What are Snap Layouts in Windows 11?
Snap Layouts allow users to organize multiple application windows efficiently across the screen.
To learn more, check our guide on Apple bug bounty program.
Does Windows 11 support Android apps?
Yes, Windows 11 includes compatibility for certain Android applications.
How can I optimize Windows 11 performance?
You can optimize Windows 11 by updating the system, managing startup programs, cleaning storage, and optimizing drives.
What is the Windows 11 Media Creation Tool used for?
The Media Creation Tool helps users create bootable installation media for installing or repairing Windows 11.Nicely, Home windows 11 is lastly upon us. For these of you who have already got Home windows 10, a few of you will have already obtained your free improve packed stuffed with options. Others may need wanted to replace their BIOS to allow TPM within the UEFI settings.
-
How To Take A Screenshot On Home windows 11
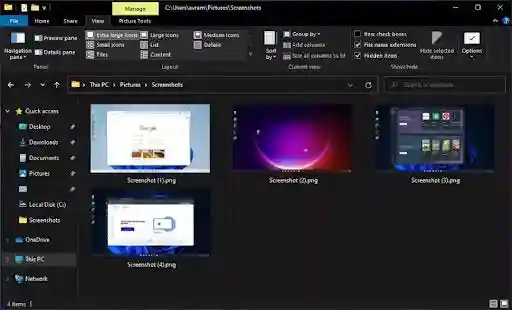
The perform to take a screenshot in your Home windows desktop hasn’t fallen away. As a matter of truth, there are six methods you are able to do it now, with a few of them nonetheless the identical because the earlier working system. You should utilize any of those strategies relying on which perform you want probably the most:
– PrtSc Key: Sends a screenshot of your complete display screen to your clipboard for later pasting, which is the best solution to take a PrintScreen on Home windows 11
– Home windows Key + PrtSc Key: Save the display screen as a file
– ALT + PrtSc: Solely takes a screenshot of the energetic window
– Home windows Key + Shift + S: You snip a small part of the display screen for copying
– Snip & Sketch Delay: Use the Snip & Sketch utility to create a delayed screenshot of some seconds
– CTRL + ALT + PrtScr: This perform lets you seize scrolling on an online web page, however solely if in case you have an app like PicPick put in.
-
How To Break up Display On Home windows 11
Home windows 11 has two methods in which you’ll break up your display screen. The primary methodology concerned urgent the Home windows key and the “I” button to entry your Settings. Search for the System choice, and open Multitasking. You’ll see you possibly can allow varied capabilities to help you in optimizing your screens.
There’s additionally a brand new characteristic with Home windows 11 known as Snap Layouts. Whenever you hover your mouse over the maximize sq. icon on the high of a window, you’ll see varied layouts seem. You possibly can then break up your display screen as much as 4 methods with varied designs. You should utilize the identical methodology to return to at least one display screen.
-
How To Defrag Home windows 11
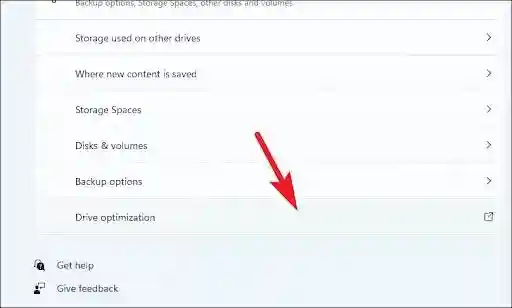
When you’re having efficiency points on Home windows 11, attempt defragging your storage disks. Your knowledge is typically scattered throughout your arduous drive, which causes lag when attempting to run packages or recordsdata. Defragmentation, or defragging, places them collectively in a method that makes them simpler and faster to entry.
To defrag Home windows 11, comply with these steps:
– Head into the Settings part of Home windows 11
– Open the System tab as defined earlier than
– Go to the Storage part
– Open “Superior storage settings”
– You possibly can click on on Analyze to see how a lot fragmentation there’s
- Subsequent, choose Optimize to defrag Home windows 11
-
The way to use Microsoft Groups on Home windows 11
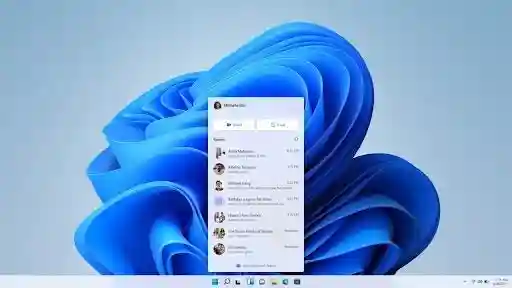
One other neat characteristic of Home windows 11 is that it has MT constructed into the working system. In case your model doesn’t have it, you and obtain Microsoft Groups and set up it, and it’ll perform the identical method.
Right here’s how you need to use Microsoft Groups on Home windows 11:
– Open MT and signal into your account
– Choose the Chat icon in your desktop to start out speaking in your groups
– You’ll see notifications seem when somebody sends you a message
– Click on on the notification icon while you wish to reply to anybody
You can too choose Meet or Chat to speak to somebody new or begin a gathering
-
The way to use Home windows 11 Media Creation software
You may wish to create a picture of Home windows 11 in case one thing goes incorrect together with your working system. It’s additionally useful if the software program received’t set up to your PC, and also you want an alternate set up methodology. Utilizing the Media Creation software, it can save you the set up file to a USB:
– On the official Home windows 11 web page the place you obtain the set up file, head decrease right down to “Create Home windows 11 Set up Media”
– After the obtain is finished, open the file
– A brand new window seems that asks which media you’d like to make use of for the disc picture, select the USB choice
– When you select, your PC will ask you to pick the USB drive the place you wish to burn the picture
– The gadgets should be linked to your Home windows to select them up. If it doesn’t, it’s essential to insert the suitable gadget after which refresh the record
– When achieved, the Media Creation software will create the picture for you, after which show the trail the place it’s positioned
– You possibly can head to the situation and both place it in your USB drive
– Be sure that to confirm the file to see that it really works
-
The way to use Home windows 11 Disc Picture
If you wish to create a disc picture of Home windows 11 on a DVD as a substitute of a picture, you’ll comply with the identical course of utilizing the Media Creation software. When it asks the way you wish to create the info, you’ll select the DVD choice.
The Disc Picture software will seem, asking you which of them gadget you wish to use to burn the picture. As with the USB course of, you possibly can then find the file in your PC to position in your disc.
The brand new Home windows 11
As you possibly can see, there are various issues you are able to do with the brand new Home windows 11 working system. We’re certain we’ll see many extra capabilities seem over the subsequent few years, so we’ll maintain you up to date each step of the way in which.
You probably have any particular questions, please go away a remark, and we’ll attempt to tackle them as quickly as attainable. For now, take pleasure in your Home windows 11 improve and have enjoyable!